Wednesday, April 27, 2011

Oops, Did I Do That? Homebrewing Misadventure #235

So, apparently you're supposed to filter the hops out before you dump your wort into the fermenting bucket. Remember when I said there was a pile of hops gunked up at the bottom of the kettle as I poured it into the bucket? Well, there's a reason--I didn't filter them out.

However, thanks to my brewing buddies next door, there was a fix! Thankfully, Nosh let me use his beer-making equipment (again), and kegged it! I didn't have to go through the corn sugar/bottling, and he has a fridge big enough for three kegs, so it's all good. The bad part? It tasted...well, hoppy. Really hoppy. I mean like so hoppy it'll make your tongue swell.

So how to fix it? Well, I siphoned the hoppy homebrew out of one keg and into the other (called a secondary...since it's the second place it's going), with the help of Jeela (rhymes with Teela), Nosh's wife. After much configuration and guessing as to which tube goes on which valve on the keg, we got it! Now the red ale is carbonated and ready and rarin' to go, sans chunks of hops. It's not bad, either...well, what I've sipped so far. I have a growler stuffed in the fridge waiting for me to get back from my workout and drink up. Taste test to ensue tonight!

Saturday, April 23, 2011

Beer-Bottle Time!

Final gravity on my homebrew is 1.011. Woohoo! This gives my red ale a final ABV of 6.2%. Yes, nice and strong. Face-in-gutter time! Kidding. Sort of. Apparent attenuation is 79.61% and real attenuation is 65.22%. This is great! I love this dry yeast.

Tonight is bottling night. Do I see a How to Bottle Beer video in the near future? Yes, yes I do. Personally, I think bottle-conditioned beer is more fun than kegging it. I like handing bottles to my friends and just popping one open after work rather than climbing over my fence and bothering my neighbors about getting a pint of my homebrew out of their keg.


Tuesday, April 19, 2011

On Homebrewing Sanitation...

More info on sanitation by Beer Monger. Not sure if that photo is an "infection" or beer. You be the judge.


Monday, April 18, 2011

Five-Day Hydrometer Reading

Woohoo! The yeast is still boogyin' down! I wasn't able to lower the temperature of the brew, so it's still at a warmish 68 F. Suggestions for summertime? I guess I could stand over it and fan it.

The reading today (after using my trusty conversion app to adjust for the 68 F temperature) was 1.016. ABV is now 5.55%, apparent attenuation is 70.77%, and real attenuation is at 57.97%. Yes! I'm totally digging this dry yeast and homebrewing stuff. It's working its magic faster than the liquid ale yeast I used last time around. Of course, I completely destroyed that batch of homebrew on my own, despite what yeast I used, but you know what I mean.


Rate Beer: Mothership Wit

What better way to celebrate a great interview (that’s J-O-B interview) than with a beer I haven’t tasted? Seeing as I live in the ghetto, which allows for only a choice between the corner liqua sto’ and Fresh and Easy, I went with Fresh and Easy. They have New Belgium’s Mothership Wit on-hand, so I went for it. Not being much of a wheat-beer lover, it was a hard choice to make.

The first thing I noticed was its cloudy, light-yellow color. It’s a good color for Easter time, I guess.

First sip: ooooweeee, that’s a lemony-fresh beer!
Second sip: Mmmm…hops
Third sip: Where’s the carbonation?
Oops, finished the glass.

I like it. And by that I mean I wouldn’t kick it out of bed. The coriander and lemon are a bit much, though. If I can taste Indian food after finishing a glass of beer, that’s not a good sign (for me, that is), but what do I know? The body is medium- to medium-light. Ow wow, my mouth feels dry now. It’s dry and full of coriander. Hmmm…not sure about this one, but that’s just based on personal preference. I’d drink it again.


20 Beers in My Future

From Beer Advocate. All of these beers have A+ or A ratings, which means I need them...stat!
  1. Trappist Westvleteren 12, Brouwerij Westvleteren (Sint-Sixtusabdij van Westvleteren)
  2. Pliny The Younger, Russian River Brewing Company
  3. Pliny The Elder, Russian River Brewing Company
  4. Canadian Breakfast Stout, Founders Brewing Company
  5. Vanilla Bean Aged Dark Lord, Three Floyds Brewing Co.
  6. Portsmouth Kate The Great,  Portsmouth Brewery
  7. Rare Bourbon County Stout, Goose Island Beer Co.
  8. Founders KBS (Kentucky Breakfast Stout), Founders Brewing Company
  9. Cantillon Blåbær Lambik, Brasserie Cantillon
  10. Heady Topper, The Alchemist Pub & Brewery
  11. The Abyss, Deschutes Brewery
  12. Bourbon County Brand Coffee Stout, Goose Island Beer Co.
  13. Citra DIPA, Kern River Brewing Company
  14. Kaggen! Stormaktsporter, Närke Kulturbryggeri AB
  15. Trappist Westvleteren 8, Brouwerij Westvleteren (Sint-Sixtusabdij van Westvleteren)
  16. Chocolate Rain, The Bruery
  17. Supplication, Russian River Brewing Company
  18. Bell's Hopslam Ale, Bell's Brewery, Inc.
  19. Trappistes Rochefort 10, Brasserie de Rochefort (Abbaye de Notre-Dame de Saint-Rémy) 
  20. Duck Duck Gooze, The Lost Abbey  


Saturday, April 16, 2011

Attenuation and Homebrewing

Why am I obsessing over my homebrew's attenuation? Because I have OCD. To refresh, attenuation is basically the amount of sugars converted into alcohol and carbon dioxide by the yeast (thank you, Wiki Brew). This number is given by a percentage. Here’s where it gets a little confusing: There is “real” attenuation and “apparent” attenuation. Why not just go by real? I have no idea. Why do beer brewers make this so difficult for me? I do know that by understanding what attenuation is, I can build a better beer, and that’s all that matters.

How does attenuation affect the character of beer? The yeast won’t eat up all the sugars during fermentation, so the amount of fermentable sugars left in the beer will affect the all-around “character” of the beer. Different styles have different amounts of fermentable sugars left when it’s at the drinking stage. This is where the hydrometer comes into play and where “real” versus “apparent” is found. The thing is, a hydrometer can’t measure the amount of ethanol in the beer, so the reading is off a little bit. The reading will show a lower sugar (extract) level than the “actual” beer has in it. That’s why this initial reading is called the “apparent” attenuation. If you want to know the “real” attenuation, you’d have to burn off the alcohol before using the hydrometer and use this formula: real extract = 0.1808 * original extract + 0.8192 * apparent extract. I prefer to use my beer app, though.

Here’s what I found most interesting about this whole thing: Different yeast strains have different attenuations. This is where getting crazy-awesome with your own personal made-up recipe can get fun. Lager yeast actually consumes all of the sugars, so there’s already a huge difference between ale and lager yeast right there. When the yeast drops to the bottom of the bucket (flocculation) or sit on the surface of the beer, it stops having much contact with the sugars. A funeral for the yeast cells is then needed. What happens when the yeast “dies?” There are still fermentable sugars left in the beer, which is part of that whole character thing. The rule usually goes:
Less flocculation = more attenuation
Closer to attenuation = drier and sweeter flavor

This is the gist of it and all I’m willing to absorb, but I’m sure I’ll get into it more later when I understand it a little better. For now, at least I know why there are different strains of yeast.

Thanks to Home Brewing Wiki, here’s a great illustration showing the process:


Congrats to Nosh!

My homebrewing "teacher," Josh Smith, just found out he got 38 out of 50 points in the Homebrewers Association National Homebrew Competition!! Congratulations! His stout is by far one of the best I've ever tasted. If I'm lucky, he'll give me the beer recipe to put up here for all to enjoy. Hopefully he's on to Round 2!

Friday, April 15, 2011

48-Hour Update

My friend calleth and I goeth to L.A. Hence the reason I didn't do a 24-hour pull for a hydrometer reading yesterday on my homebrew. That's ok, what is time but procrastination's devil?
At 48 hours, hydrometer reading is at exactly 1.020 at 68 F.


Ok, at exactly 48 hours, the hydrometer now reads 1.020 at 68 F. This brings up two things: First, the beer is a tad warmer than I'd like it to be, so I'm going to throw it in my bathroom corner, which doesn't get much light, therefore is cooler. I want it down to about 64 F if possible. And two, since I didn't take the reading at 60 F, I need to pull out my trusty Brewzor Calculator app and figure out what the reading really is. Oh, well that's not much of a difference now, is it? It's actually 1.021. Now, I subtract 1.021 from 1.058, the original reading, and find out that the ABV (alcohol content) and attenuation is at ABV 4.88% and apparent attenuation is at 61.99% with real attenuation at 50.79%. I'm not exactly thrilled by this because I was hoping the attenuation would be at least 70% and a little more productive, but it's only been two days, so hopefully these numbers will change for the better.

The color shown above is the actual color at the moment, too. This will most certainly change and get darker over time. Now for a little sippy poo. Wooooweee, that is bitter! But wow, those hops sure taste good!

Ok, another reading will be done tomorrow at the 72-hour spot. A lot of people on forums said this yeast finishes its doing its thing after only two days sometimes, but I'm hoping to get one more day out of it at least. Unfortunately, the airlock (excuse me, but that burp tasted delish!) isn't moving, so that worries me a bit. Last time, when I used a liquid yeast, it took a good four or five days  to finish up. I'll wait for at least three days of steady hydrometer readings before I decide to bottle my beer.

Thursday, April 14, 2011

Yeast on Fire!

I was starting to get worried when the fermentation process for my home brew hadn't started after a couple of hours but, last night, about six hours after pitching it, it finally woke up. Phew! If it hadn't started, I would have gone and purchased a bottle of liquid yeast and pitched that in there, so it wouldn't have been all bad. Below is a video of the airlock spitting away. That's a sign the yeast is eatin'!


Nosh told me how to read the hydrometer, so now I know what the actual original gravity (OG) is. Seeing as I read it while the wort was at 80 degrees Fahrenheit, I will need to calculate it to convert the number to what it would be at the temperature I was supposed to test it at, which is 60 degrees F. The gravity reading shown is about 1.055. To convert it as though it was taken at the right temp, either do the math or open a fancy app, such as the one I use, called Brewzor Calculator. The math is as follows: For every 10 degrees above 60 F, the measurements are off by .002-.003. So, if your brew measures 1.038 at 80 F, you need to add .004-.006 to that. Brewzor Calculator did it for me. My actual reading came out to 1.058, which is .006 higher than what the recipe said it would be. This is ok, that's pretty darn close! This could be because I didn't add quite enough water to replace the water that evaporated, but I still think I did pretty well. I'll take another reading at the 24 hr. since pitching mark today so I can follow what's called the attenuation.

Attenuation is the percentage of sugar (extract) that has converted to alcohol and CO2 by the yeast. This is important if you want to really take great notes and start to understand how to build your own better brew in the future. At least, that's my goal. For now I'll just play scientist and pretend I really understand. The type of yeast strain you choose affects attenuation, which I never really considered before. This, in effect, affects the taste and character of the beer. Most companies will give you the attenuation rates, so I'm going to go check mine. Be right back. Great, the attenuation rate looks like Greek to me. After scouring 326 forum posts about this particular yeast, it looks like the attenuation is perfect for an ale. Most people said the best temperature to ferment at is about 65-68 F. I'll check the temps this afternoon at the 24-hour point. Apparently a dry yeast also takes less time to ferment, so keep that in mind before you reach for the same liquid version. Be back in a few hours with the exciting results!

And that's why your kids should help you brew: Science!

The bubbles are covering the reading, but original gravity is at about 1.055.


Wednesday, April 13, 2011

Alone and Homebrewing

Today starts the first attempt at homebrewing by myself. Is it scary? Maybe a little … I kind of relied on Nosh to help me out a bit too much last time, so hopefully I have enough confidence in having retained at least a little bit of his knowledge. I’m hoping to be up-to-par for the next big brew day at his pad—you know, with like … real brewing equipment … and not more of a helpless burden of a student.

What am I brewing? A red ale recipe from an extract kit I purchased from Stein Fillers in Lakewood, California.

Brewing Equipment: I wouldn’t say “equipment” so much as “a few things I borrowed from Nosh.” The only beer-making equipment I actually have is sanitizer and a large sauce pan. No kidding, that’s it. For an extract kit, you really don’t need that much:

* Star San sanitizer
* 5 gallons of fresh, clean, filtered water ($1.00 from the kind Asian man who owns a water, pagers, phones, Dickies, shoes, and other extra shit you’ll never buy store. If you’re from Long Beach, you know what I’m talking about.)
* 4-gallon (16-quart) pot for boiling malt extract
* Large sauce pan (at least 3-quart) for steeping grains
* Stirring spoon (plain-old wooden spoon)
* Enough ice to cool down California
*6 1/2-gallon (26-quart) fermenting bucket w/ three-piece airlock
*Candy thermometer
*Hydrometer
*Grain bag
*Gas stove


And here’s the beer recipe:

Red Ale
MALT:   6 lbs. Pale Malt Extract
GRAIN:  Crystal Malt 150° L, 1 lb
                Belgium Special B Malt 190° L, .25 lb
                Black Roasted Barley (usually about 500° L), .25 lb
HOPS:     Mt. Hood, 1 oz @ boil
                Cascade, 2 oz @ finish
YEAST:  Safale S-04 Dry Ale Yeast

OG: 1.052
FG: 1.014
SRM: 26
IBU: 17
ABV: 5.2%
(Read below for info on these numbers.)
Shane McGowan, my favorite Irishman

About Traditional Irish Ales:
Traditional Irish red ales are light-red to light-brown SRM 11-18), so this is by no means traditional. Plus, I’m using an English ale yeast, not an Irish ale yeast. OG (original gangsta’… er … gravity) is 1.040-1.048, where this one is supposed to turn out to be 1.052 — a little stronger than the traditional. The bitterness, or IBU, is from 20-28, and this one is 17, so it won’t have the same bitter qualities. Well-known Irish ales include Smithwick’s (no, not Smith-Wicks, foolish American, it’s Smiddicks) and Murphy’s Irish Red.

Joseph Lovibond. He put the L in ... Lovibond?

And the “L”?
The “L” after the grain stands for Lovibond, or rather, degrees Lovibond, hence the ° after the number. This is a scale used for measuring grain color. These numbers correspond with what’s known as the Standard Reference Method, or SRM, hence the “26” after the SRM below my list of what comes in the kit. Seeing as “Black” has an SRM of 20.0, I can only assume this beer is gonna’ be dark! Could the absence of color be any sweeter?


MALTS

Pale Malt Extract (Base Malt)
So now that I know what color it will be, I’m onto figuring out what the malts I’m using are all about. First of all, I’m using an “extract,” which is a shortcut to getting to the wort (basically your “beer,” sans the yeast … basically just sugar from the malted barley and water). I’m all about simplicity after the last disaster. A malt extract is malted (sprouted) barley that has been made into a malt syrup or powder by being dehydrated, or evaporated. My particular malt is a syrup, so it hasn’t been completely dried. This extract is called the “base malt” because it gives the main fermentable part of the beer. The malt I’m using is called pale malt extract. A pale malt, after being sprouted and dried, is then kilned to a slightly darker color than traditional pilsner malts, from 3 to 4 L. It’s usually used in traditional English beers. Unfortunately, I don’t know exactly what variety of barley was used, so I can’t really judge what the character or flavor will be, nor how many sugars or soluble starches are in there. Sometimes corn, rice, wheat or rye are thrown in there, so I guess I’ll never know. That’s the drawback to using a less-expensive extract. Whatever, I’m cheap.

Crystal Malt (Caramel Malt)
Next up are the steeping grains, which are used for flavor and body. I’m using 1 pound of crystal malt, otherwise known as caramel malt. This malt is made from barley that’s green, meaning it hasn’t been kilned. It’s just straight dirty-hippy barley. It’s also created under very controlled measures. When this barley is cooled, the sugars turn into hard crystal. This malt won’t add to the fermentation, but it will add to the flavor, hence the reason it’s also called caramel malt. Not only will it add to the flavor, but it also increases the body of the beer as well as in head retention. Since the Lovibond is 150°, it’s considered dark…like REALLY dark. A Lovibond degree this high is supposed to give a pretty sharp caramel flavor and aroma. Damn, this is going to be a strong beer!
My grains


Belgium Special B; photo www.brewdudes.com
Belgium Special B Malt
Also called for in this beer recipe is .25 pounds of a malt called Belgium Special B. This is also a type of crystal malt traditionally from Belgium. Whether or not mine was actually malted in Belgium, I don’t know. I’m going to pretend it was. Again, this is a dark pile of grains.  This malt is usually used to add raisin-like flavors to dark Belgian Abbey-style beers. But since I’m using such a small amount, it’ll be used more for a more complex, rich flavor, such as a brown or mild ale. My mouth is watering. Seriously, I just drooled on my desk. Gross.

Black Roasted Barley; photo www.riceriverfarms.com

Black Roasted Barley
Ok, here’s where the real dark and bitter qualities come from. The bitterness in this malt is considered “high,” but hopefully not jaw-crushing high. I’m using .25 pounds of this dark stuff, too. This barley is usually unmalted and roasted at high temperatures for a coffee flavor. Most dry stouts use this malt, and more of it.


HOPS
Hops are used to add bitterness to counteract or balance the sweet, sweet, delicious malt. Not only do hops do that, they also help stabilize and preserve the beer. My kit has hop “pellets,” which are dried, chopped and compressed into tiny, itsy bitsy pellets. So here’s where IBU comes into play. Notice my kit says the IBU (International Bitterness Units) is 17. Get a book if you want to really get into what that means, because I’m not going to attempt to casually put it in here. I can’t even add and subtract properly, much less figure out IBUs. Here, try this on for size: IBUs = 1.65 * 0.000125^(SG - 1) * ((1 - e^(-0.04 * t)) / 4.15) * ((AA * m * 1000) / V) See? There are plenty of apps that do this for you, too. I just let the outside of the cardboard box this kit comes in to tell me what I need for now.

What I can relay is that IBU of 17 means this brew is not toooooo bitter. The standard Irish red ale has a low-to-no hoppy aroma and medium-low hoppy bitterness in flavor. The black-roasted barley I’m using will add some bitterness on its own. And since I accidentally boiled it for a few seconds (as you’ll read below), I might have added an “extra special touch” of bitterness. Oops.


Mt. Hood
These hops are homegrown here in the States. The alpha acid content is 4.5-8%, so I don’t know exactly where mine falls. This is how you calculate the bitterness, by the way, by alpha acid content. I’m not ready to get into how to figure out bitterness quite yet. This variety of hop is being used in this case mainly for bitterness. How do I know? Because I’m supposed to toss 1 oz of them into the pot at a toasty rolling boil. Why not just throw all of the hops in the pot at the beginning? Blasphemy, that’s why! Because the chemical reaction needed (isomerization), which makes the alpha acid resins soluble in water. The beta acids become soluble only from oxidation, which is quite the opposite. Basically, don’t use old-ass hops that have been sitting on a dusty shelf for a year. Remember, the flavor and bitterness of hops are two entirely different things.

All in all, total IBUs when punched into my fancy program, ProMash, is 82.1. I don’t know what that means. Hmmm…at a loss.. Sounds a bit high, doesn’t it? If my jaw locks after sipping it, I’ll know it’s too high.
Fresh Mt. Hood hops

Cascade
These are your typical all-American hops. In this case, I’m using them for aroma, which is why they’re called “finishing” hops. I’ll throw these in about 15 minutes before the end of boiling. These hops are usually used for IPA-style brews, so I can only assume they’re pretty … well … hoppy. Usually they add some citrusy and floral flavors, mainly grapefruitish. Alpha acids are 5.5-7%, a little more than the Mt. Hoods I’m using for bittering.
Fresher-than-fresh Cascade hops

YEAST
This can be a frightening word. Yeast is alive! It moves, eats, releases, belches and makes beer delicious! Single-celled organisms tend to do that. Yeast converts sugar into alcohol and carbon dioxide, which is the carbonation. There are literally thousands of different strains of yeast, but only a few are used for brewing. The type brewers use are from the genus Saccharomyces.

Photo: www.altmd.com
There are liquid and dry yeasts you can purchase. My beer recipe called for a dry yeast called Safale S-04 Dry Ale Yeast. I’ve never seen anyone brew beer with a dry yeast, so this will be new. It reminded me of powdered milk, so I had a natural aversion to it for my first homebrewing attempt. Thanks, dad. This means I’ll need to rehydrate it before pitching it into the concoction. S-04 is apparently known for its “flavorful profile,” which works for me! I wouldn’t know the difference yet, anyway. Dry yeast is supposed to be a quick starter, which is great because I like to hear the bubbling of the yeast munching on sugars while I sleep. Sweet, sweet, sugar eating. It’s kind of relaxing.


Ok, Here We Go! How to Brew Beer:


Grains in their handy grain bag
Steeping grains
1. First thing’s first. Since the step of taking the sugars out of grains has already been done for me, resulting in the extract, I simply steeped the grains in a covered sauce pan with 3 quarts of hot (clean) water until at 150° F for 30 minutes. Ok, live and learn … I thought that keeping the heat at medium-low would produce a steady 150° temp, but since it’s covered, it of course boiled. Great. Don’t do that! Keep it covered, but I suggest keeping the heat on Low. Ugh. I hope I didn’t just destroy the brew. I use a candy thermometer because of the handy-dandy clip, but you can use a floating thermometer if you have the urge to burn the crap out of your hand every 5 minutes to check the temperature.

Grain "tea"

Placing the bag over a strainer
allows for an easy rinse.


2. After 30 minutes of making grain tea (They’re in a grain bag, but you can use a regular kitchen strainer or cheesecloth if you want to be even cheaper than  me.) I drained and rinsed it with 3 quarts of very hot water that’s at 170° F. So many numbers! I needed this tea for boiling the extract, so I just kept it in the pot and put it aside for later. Placing a basic strainer over the pot and throwing the grain bag on top of it seemed to be the easiest way to rinse the grains. What do you do with your grains? Call your local pet shop and see if they want them because they’ll make dog biscuits and other delicious goodies for our four-legged loved ones.

Giantus kettleithicus
Pouring the extract syrup into boiling
pot after removing from heat
3. Next step was to bring 2 gallons of water (again, use the clean water) to a boil in a stock pot that’s at least 4 gallons (I was lucky to have borrowed a 7-gallon pot), took it off the heat after boiling, and then added the extract. After I was sure the extract wasn’t sticking to the bottom of the pot and was mixed in well, I added the grain tea and enough water to bring the volume up to 3 gallons. (Remember, water evaporates in the boil.) As for the candy thermometer, oops, my bad. Now my dumb self has to stick my hand in the pot to measure it since the thing is made for a little old lady making candy in a small pot. Get a real brewing thermometer, one that’s nice and looooong.


Mt. Hood hops pellets
She's a brewin'!
4. I put this mixture back on the heat and brought it to a boil. As soon as the first bubbles starting bursting out of the top, I added 1 oz of Mt. Hood hops and let it continue boiling for 60 minutes. Phew! The hard part is done. So many numbers, so little brain.


5. After an hour of boiling with the hops and all, I turned off the heat completely and threw the 2 oz of Cascade hops in there.

6. This next part was really important, but difficult to achieve properly because of lack of brewing equipment. Usually homebrewers have a crazy contraption called an immersion wort cooler that is made of wrapped-around copper piping they connect to a hose or sink in order to cool the wort. Why do you need to cool down the wort as soon as possible? This reduces the chances of bacteria growing before pitching (literally tossing in) your yeast and also improve your beer’s clarity.


Note the amount of water that evaporated
so you can replenish your fermenting bucket.

7. Since I’m po’, I used the age-old method of dumping my pot in a sink full of ice and cold water. The only thing I really don’t like about homebrewing is the amount of water needed to clean and cool down the wort. I feel guilty. I’m going to confession, be back later. At this point, I also poured 1 gallon of the remaining water into my fermenting bucket since I lost about that much during the different boiling steps.
The dopest way to cool down your wort


Yeast, being yeasty
8. While the wort was going through a few minutes of ice melting, I used that time to rehydrate my dry yeast. To do this, I boiled 1 ½ cups of water and threw it in a sanitized cup, and then let it cool down to 105° F (put the sanitized thermometer in the cup) before I tossed the yeast in it. I let the yeast sit in there until the wort that was cooling in the sink and the yeast were at the same temperature, about 70° F.


9. WAIT A SECOND!!! Before I pitched the yeast in, there were two things I needed to do first: scoop up a sample of my wort with my hydrometer and pour the wort that’s been chilling into the fermenting bucket. Try to make it “splash” a little bit to aerate it. I didn’t actually “scoop” it. Unfortunately, I goopy pile of mushy hops was gunked up at the bottom, so I hope they dissolve or whatever they do. Yikes.

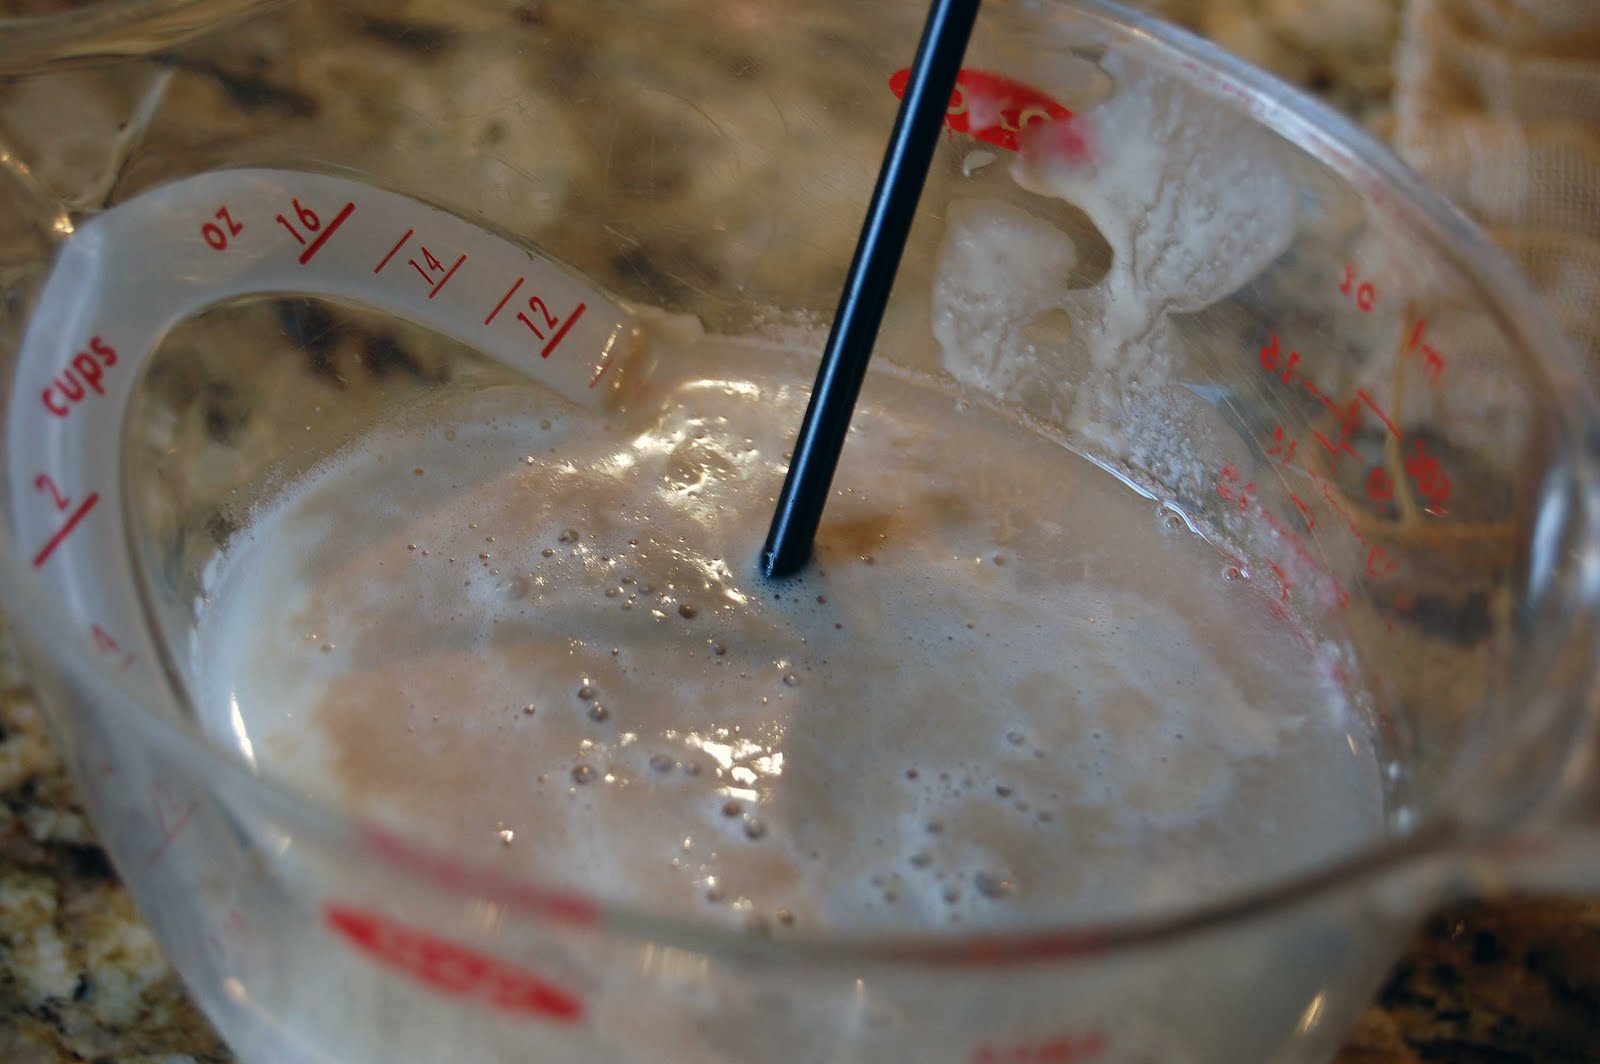
I filled up the hydrometer container from the fancy spigot on the bucket. Remember, you don’t want anything touching your wort, especially your dirty hands. Go wash them, they’re dirty. You’re gross. You don’t technically have to take a hydrometer reading, but if you want to take good notes and know the density of the wort (relative to the density of the water), you’ll do so. This does a few different things for you, but the main reason I’m testing it is to find out the alcohol content (ABV). I will also test it once a day when I hear the yeast stop working it’s corner to see if it has changed. If it hasn’t, then the yeast is tired of pimpin’ and the beer is ready to bottle. Why take a sample at this temperature? Because a proper density reading can only be achieved at 60° F. Otherwise, you have to do dreaded math.
I have no idea what this reading is, but Nosh will tell me!


My house smells delicious! My roommates will be so excited…


Monday, April 11, 2011

Homebrewing: Day 1, continued

To make a long story short, I sanitized. What happens if you don’t? Well, a few things, the most important being your beer will totally suck. If you want to know why  your beer will suck, read on. If you couldn’t give two poops and a rat’s tail, then don’t read it—pretty simple.

The boil will kill anything in your brew pot or stirring spoon, so you don’t have to worry too much about that. But, you do need to clean your fermenter, bottles (I would wait until bottling day), airlock, racking equipment, bottle caps, kegs and tubes. Basically, all of your homebrewing equipment. And, by the way, take it easy. You know, “Easy Does It,” but with drinking aloud. Scratches happen, but you don’t want them to, so do your best to avoid them. If you’re using a $15 plastic bucket like I am (great beginner’s homebrewing kit!!), keep in mind that plastic scratches easily, so just keep it mellow and without scrubbing pads. Speaking of buckets, don’t just go out and buy a painting bucket from Home Depot! Big N-O! This isn’t food-grade plastic, or polypropylene. I would suggest the sanitizer I threw out there yesterday or bleach. Although, bleach can sort of continue smelling up the joint and has been known to cloud vinyl, so I would stay away from that, too, unless you’re just dying to brew and can’t wait to get proper sanitizer (like I did the first time with my bottles, and we know how well that went). Scented cleaners are a big no-no, too. If you’re cool enough to have a glass carboy (basically a 5-gallon glass water bottle, but not), bleach will leave lime deposits if you have hard water. How many times do I have to tell you to skip the bleach?

The Star San sanitizer only needs about 30 seconds to do its job, so it won’t take long at all. It says to use one fluid ounce per 5 gallons, so you don’t need to go crazy with it, either. You can use a pressure cooker and heat to sanitize as well, but I’m not getting into it because I’ve never used that method. I mean, of course I’ve never used this method, I’ve only brewed once. If you’re saving your bottles for your own bottling use, keep in mind that yeast and other gunk often gets stuck inside the bottles if you don’t clean them pretty well the first time. Always use a bottle brush to clean and sanitize these puppies. You don’t want to know the disgusting gunk I found in Nosh’s bottles. (Sorry Nosh.)

Why do you need to clean the crap out of everything like this? Well, you’re dealing with bacteria to begin with, so you need a controlled environment to keep it all working well together. Yeast, when mixed with certain bacteria, can present strange flavors, and not the good “oh man, that accidental Acinetobacter baumannii flavor you had in that batch was killer. Hehe, get it? Types of bacteria that can actually be found in botched brews: lactic acid bacteria, which turns beer into “sour beer.” The two most known are: Lactobacillus (a cheese culture) and Pediococcus (used in making vinegar). To be honest, there are some great sour brews out there, including one my brewing buddy made, but he knows what he’s doing. My sour beer would most likely turn into a jawbreaking scream fest.

There is also something called “wild yeast” that is yeast in low levels. This is alongside the yeast you already “pitched” into your fermenter on purpose. Sometimes, such as in a Belgian ale, this is beneficial yeast, but for me, it’s not.

So, after about an hour of cleaning, soaking and sanitizing my brewing supplies, we started the process. What that entailed I don’t remember much of because my mechanic called me to let me know my car needed a new engine, so I went into freak-out mode and my friend, Nosh, was sort of forced to start steeping my grains without me. I couldn’t have been a worse brewing buddy that day.

And here’s where my first experience ends and the recipe and screw-up begins. I have no idea what exactly the steps were because I was so preoccupied with my car that I sort of blanked out. Don’t do this! Pay attention to everything you’re doing, keep a timer and take a lot of notes! And p.s. I didn’t need a new engine, I simply needed an engine coil, which I replaced myself for less than $100. Thanks for asking. Here’s the beer recipe:

British Mild
MALT:   3 lbs Light Dry Malt Extract (Only starting out with extract brewing for now)
GRAIN: Crystal Malt 60 L (I’ll get into what the “L” stands for later), ½ lb
               Brown Malt, ½ lb
               Chocolate Malt, ½ lb
HOPS:   Goldings, ¾ oz at boil, ¼ oz 15 min. before end of boil
YEAST: White Labs British Ale

And this is where the screw-up began…
SUGAR: Organic Clover Honey, ½ lb
                Unsulphured Molasses, ½ lb
                Organic Brown Sugar, 1 ¼ cup

I decided to take a perfectly fine beginner’s ale and add my “special ingredient,” which consisted of all of that sugar. Yep, just mixed that puppy all up into a goopy, disgusting (no, delicious) mess, and dumped it in the pot just before boiling was finished.

The result? After a week of fermenting and two weeks of bottle fermenting, it was NASTY! There was little carbonation (that’s just because I didn’t let the bottles sit long enough because I’m impatient as all hell) and kind of sickening-sweet.

I will admit that after three more weeks of sitting around in bottles (not that I really let them sit around), it ended up not being horribly bad. My friends liked it (the ones who drink Bud Light), but I was thoroughly disappointed. Nosh wouldn’t even finish his pint. Ouch!

Tomorrow is a new brewing day with an all-new outlook and pile of knowledge. Photos and more to come!

Saturday, April 9, 2011

How to Brew Beer: First Brewing Day...EVER

Homebrew Day, Hour 1:
“So…uh…what do you want me to do?”
“Clean”
“Clean? Clean what? Why? How? Where? When? With what?”
“Shuddup, Colleen.”
“OK.”

Yep, that was my job, and will be your job, as well—sanitizing (Don’t get that confused with sterilizing, like I did. I thought I need to boil everything all the way down to the spigot on the fermenting bucket. That would have been an interesting attempt at pretty plastic art.) No, but I do suggest picking up what seems to be the easiest product to use for sanitizing everything, plus it’s food-grade, so if you don’t completely rinse it off your stuff, you’re still good and it won’t affect your brew, nor your cells: Five Star Star San. I have fond memories of using this during my janitorial days. Fine, so I was fired for eating all of the doctor’s office’s Hershey’s Kisses and accidentally filling up the dishwasher with Ivory dish soap. Details, details. At any rate, this stuff is great. Here, have a photo.
You're going to get to know this product well.
 When I say sanitize, I mean sanitize. I'm talkin' tubes, pipes, spigots, buckets, feet, hair, hands, everything. Ok, you can skip your body parts (Your hands will be sanitized once touching this stuff, believe me.), but every single thing that will be even remotely close to your wort needs to be clean.

You know what? I'm getting waaaay ahead of myself. What you really need to do first is get a book. Not just any book, but this book (below on the right). Then, when you've finished studying it and you get your next unemployment check, pick up this book:

This is going to be your very best friend.
Yes, you need this, too.
The "Joy of Home Brewing" (purchase from Amazon.com on link below) is a classic and is a must-read. Seriously, you MUST read it or you will be totally lost and not know what you're doing, unless you have a good friend like I do to share his or her wisdom about brewing beer with you. Most people aren't as lucky as I am in that respect, but you can certainly make friends at your local homebrewing supply store, too. I've had nothing but great luck with friendly staffers and customers alike here in Lakewood, California, at Stein Fillers. I even felt comfortable enough to tell them the immense screw-up I perfected with the first kit I bought from them.

As for the second book, "Brew Ware," (Amazon.com link below) unless you, again, have a great friend like Nosh (not to be confused with Josh), who will happily loan you some brewing supplies, you'll need to figure out everything you need. This book also tells you how to make some of your own stuff on the cheap, too.

If you're absolutely, totally broke and happen to stumble across tons of free supplies and other necessities, check this amazing site out: How to Brew. (click Amazon link below to order book online). John Palmer is an amazing guy. Why? Because his book is online for FREE! It has a ton of information that you'll need to start out with, but please, do the guy a favor and eventually buy his book. It's one of those necessities, for sure.


Friday, April 8, 2011

Adventures in Beer Brewing

"Feed me!"

Here’s the first thing I learned after tasting my very first homebrewed batch: Ew. You are not as cool as you thought.

Mistake #1: I didn’t read anything. Nope, not one thing...oh, save for a few forum threads that read “Here’s how you increase alcohol.” That was about the most important thing to me at the time. Why? Because I’m an alcoholic. Ok, not really…only usually. Basically, I read that the more sugar you ferment with your wort, the higher the alcohol. Guess what? That also means the higher chance you have of totally ruining your beer if you don’t know what the hell you’re doing and you don't know how to read your beer recipe.You know, like me.

My first homebrewing kit was simply called “British Mild.” Why did I pick that kit? Because it was the cheapest one on the shelf and I got a free bottle of yeast with it.  I didn’t even like British mild ale. It tasted weak to me, and being a big, strong, strapping lass, weak doesn’t fit into my lifestyle. Fine, I’m actually kind of a wimp, but I still don’t particularly like mild ales. Besides, what’s a girl to do with 3.4% ABV? Enjoy the flavor? Ha! Why would I want to do that? How am I supposed to get so drunk I wake up in the gutter with a rock stuck to my face with 3.4%?

Mind you, this is simply what I thought at the time. Now that I appreciate going through the beer-making process and ritual of brewing craft beer (best done among friends who actually know how to brew and are fun to hang out with…and are kind enough to loan you the equipment you need for your first couple of batches), and tasted the British ale my buddy brewed with me that very day, I appreciate the mild flavors. As soon as the creamy, light liquid stepped it’s way across my taste buds, I kind of fell in love a little. Suddenly, alcohol content didn’t matter and I just wanted to enjoy this new-found flavor. That’s what I wanted to do with my next beer — create a great flavor.

Oh yah, also, don't be fooled by the name. Although I won't use any animal products to homebrew, I can't honestly say this is a blog about organic beer brewing. Maybe it will be eventually, but like I said, I'm not that cool.